Rather see the video?
Click here to check out the 2021 video version of this article on our sister site Simply Mixing.
Vocal compression might seem like a dark art if you’re new to mixing, and it can take a while to fully understand compression and hear what it’s doing.
How many tutorial videos have you watched by the mix engineer legends where they demonstrate vocal compression from a famous mix that leaves you feeling frustrated because they can hear something you simply can’t?
Probably a one or two.
Only by playing and experimenting over time will you properly understand how to use a compressor on vocals and in this post I hope to make that path a little shorter so you can get a great vocal sound dialled in quickly and confidently.
It’s not easy but you can do it. We all have to start somewhere, even the pros weren’t awesome in the beginning.
What Is Compression?
A compressor does three things:
- Changes the transient; with vocals, that’s the consonants
- Brings the loudest and quietest parts of a signal closer together
- Adds “character” or not, depending on the compressor
For more indepth discussion about compression you can check out my blog and video on the Simply Mixing website.
Compressor Types
Not all compressors are of the same design. They each have their own “character” or sound. The four most common ones are:
- VCA
- FET
- Optical
- Variable-Mu
Each has their own sound characteristics and is probably something to consider further, once you’ve got the basics of compression down.
Stick a pin in this idea and look into it later down the line but the TL;DR description is that their names describe the gain reduction circuit for that particular type of compressor and how they react to the input signal. They impart certain sonic qualities depending on the type used that can further enhance the sound beyond the standard parameter settings.
The Problem With Vocals

The most important thing with vocals is that you can hear every word.
Vocals are very dynamic and can usually benefit from a little, or a lot, of control, depending on the singer’s experience, performance and the musical genre.
If a singer isn’t that well acquainted with recording and rely on their live singing technique, then problems could arise and compression can save the day.
Vocal compression can cause its own problems. It brings up the background noise, breaths and emphasises sibilance in a vocal. Mastering the release setting will control this aspect of the vocal but also, you can tackle these problem areas BEFORE the signal even touches the compressor circuit by using clip gain to manually control the peaks and breaths. I find around -6dB clip gain on breaths and sibilance works really well for me.
In fact, using multiple compressors can work better than having only one do all the heavy lifting. Split the compression over two compressors in series, one to hit the peaks with roughly -4dB reduction and the second for a more gentle, overall compression of -2 to -3dB. The result is a more natural yet fully present sound.
The two compressors used in this way, traditionally, are the Urei 1176 followed by the LA2A.
Compressor Controls
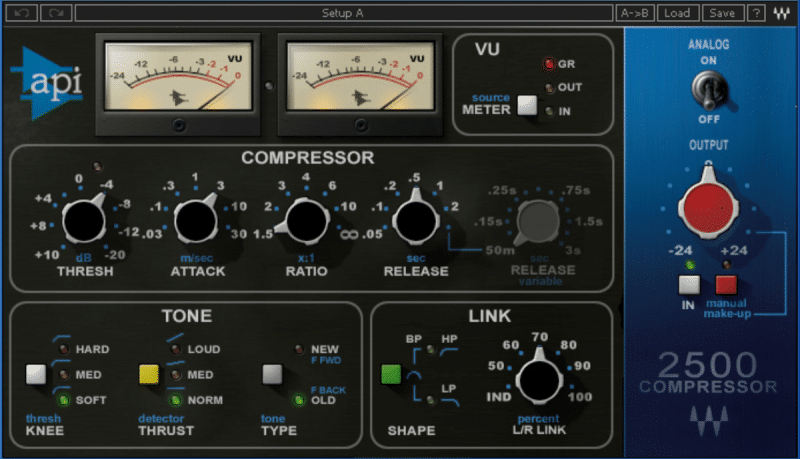
There are six main controls on a compressor:
Threshold
The point in signal volume at which compression starts
Ratio
The amount of level reduction that takes place once the signal crosses the threshold. E.G. 4:1 = for every 1dB that goes over the threshold, 4 dB will be reduced.
Attack
Determines how quickly, or slowly, the compressor reacts to the incoming signal, making the vocals sound either smoother or edgier and aggressive.
Release
Determines how quickly, or slowly, the compressor allows the audio to return to its normal level, shaping the ends of words, phrases or breaths.
Knee
Determines the sharpness of compression. Soft knee is subtle, hard knee is more aggressive. Hard knee is good for rock vocals.
Makeup Gain
Gain added to bring back the level lost because of compression. Dial-in by ear.
Slow, Slow, Quick, Quick, Slow
I remember getting confused about what should have been fairly simple, but I just couldn’t get my head around “fast, slow, long and short” and which numbers were, in fact, fast or slow.
I don’t know why, maybe number blindness or something but anyway, this might help if you’re feeling the same confusion.
WARNING: lack of fancy graphic…

A good starting point for a rock vocal would be a 4:1 ratio with a medium-fast attack and a medium release.
Then, set the threshold for around 4 to 6dB of gain reduction. Increase or decrease the attack time until you get the right level of forwardness for the mix.
You can use the attack and release times to set the vocal (or instrument) further back in the mix or bring it more upfront. Taking the edge off the consonants by speeding up the attack will give the impression of the vocal being set back into the mix but still being able to hear all the words.
How To Use Compression On Vocals
So, where do you start? What do you do first?
Ask yourself, what am I hearing in this vocal performance that needs correcting or enhancing?
- Are the verses way quieter than the chorus?
- Does it sound “spiky” or too edgy?
- Is it too soft or laid back for the genre?
- Can I hear every word?
It’s best to have a clear picture of what it is you’re trying to do here, rather than going in and blindly twiddling knobs or applying presets.
That said, because of all the possible choices, I’m going to give you a general guide to use as a starting point.
My 6 Step Compressor Set-Up Method
Step 1
Set a medium-fast attack around 15ms and a medium release of around 80-100ms. Don’t worry about the exact numbers. Just think “medium”.
Step 2
Set a moderate ratio of about 4:1 then bring down the threshold until you’re getting 10+dB of gain reduction on the volume peaks, enough so you can hear the compressor over-working.
Step 3
Adjust the attack until you get the level of edge or forwardness for the genre.
Step 4
Speed up the release if you want more aggressiveness or energy, slow it down if you want a more natural sound to the vocal
Step 5
Once you’re happy with the tonal quality, reduce either the threshold or ratio to lower the amount of compression to about 4-5dB
Step 6
Make up the loss in level by adding some makeup gain
Spend plenty of time adjusting the attack and release time until you are happy with the vocal tone. Use a fast attack time for thick, heavy vocals and a slow attack time for punchy, aggressive vocals and do this whilst listening to the whole track, not just the soloed vocal.
Download this article as a handy PDF guide! – CLICK HERE
Conclusion
Like I said at the start, compression is probably the thing in that takes the most time to master when learning how to mix music.
How you use vocal compression really depends on the song, genre and recording quality and so it makes it impossible to give you settings that will be perfect every time. It takes time and practise listening to compression to learn what works and what doesn’t.
This article only touches the surface of vocal compression and there are loads of brilliant videos and blog tutorials that go into much more depth, however, I wanted to give you a basic starting point from which to grow your knowledge.
You can learn more about compression and how to use it by checking out my video HERE.
I’ve written another blog post about the challenges you face if you mix your own music that you might find relevant and interesting.
If you are interested in having me mix your music and are wondering how to prepare your mix then check out my blog post: How To Prepare Your Track For Professional Mixing
If you want to know more about my online mixing service, then you can go to my mixing page or contact me here.
How can I learn more about mixing and mastering from Sara?
Simply Mixing is my educational website dedicated to help you become a better mix engineer, with free mixing tutorials, guidebooks and advice updated every week.
Subscribe to my weekly Simply Mixing tips, exclusive subscriber tutorials and updates for more mixing tips and tutorials to help you produce professional sounding mixes from your very own home studio.






14 thoughts on “Vocal Compression Settings – How To Compress Vocals Like A Pro”
thanks for the information
Thank you Sara for the very useful information. Please continue with your work. I like you approach, its simple and easy to understand, both your written work as well as your videos.
Neeraj Beharie
Thank you! And thanks for reading (and watching!)
Am a talented vocalist from Kenya 🇰🇪. Am glad to find this information Sara, but my concern is that my voice is naturally and automatically reverberated. How can I mix this one?
You’re welcome!
Sara..I have viewed one million four hundred and seventy six point four videos on this subject of compression and not once have I ever heard the information you gave regarding consonants are the transients. When I read that , I immediately related it to a snare drum. Next time I mix vocals that thinking will be in the back of my head. Thanks for the revelation. Blessings to you!
You’re welcome!
Your way of telling all in this post is actually good,
every one can simply know it, Thanks a lot.
After looking at a few of the articles on your web site, I truly
appreciate your technique of writing a blog. I saved it to my bookmark website
list and will be checking back soon. Please check out my website as well and let me know your opinion.
Wonderful blog! Do you have any tips and hints for aspiring writers?
I’m planning to start my own website soon but I’m a little lost on everything.
Would you recommend starting with a free platform like WordPress
or go for a paid option? There are so many options out there that I’m
completely overwhelmed .. Any ideas? Thank you!
Hi would you mind sharing which blog platform you’re working with?
I’m going to start my own blog soon but I’m having a difficult time selecting between BlogEngine/Wordpress/B2evolution and Drupal.
The reason I ask is because your design seems different then most blogs
and I’m looking for something unique.
P.S Apologies for being off-topic but I had to ask!
I’m using WordPress, hope that helps.
I know this site offers quality based articles and other information, is
there any other website which provides such information in quality?
this is SOOO helpful thank you!